Orax SDI Cloud Reference
- Introduction
- Self-Management tools
- Communication and Content management
- Sales and Customer Engagement
- Service Desk
- Project Management
- Automation & Wide-Area-Monitoring
- Job Cards
- Education & B-2-B online training
- Billing and customer statements
- Inventory & Asset management
- Production management
- Human Resources and Payroll
- Procurement and Supply chain
- Ledgers & Accounting
- Reporting and Analytics
- Administration & configuration
Setting up your User Profile and changing your password
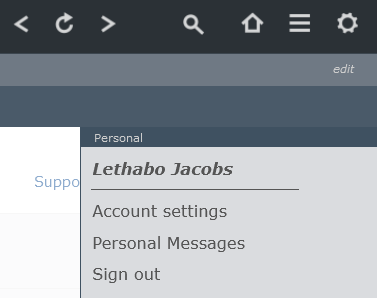
You can access your account settings by clicking on the settings icon (little cog wheel) on the top right of the page.
Setting up your User Profile
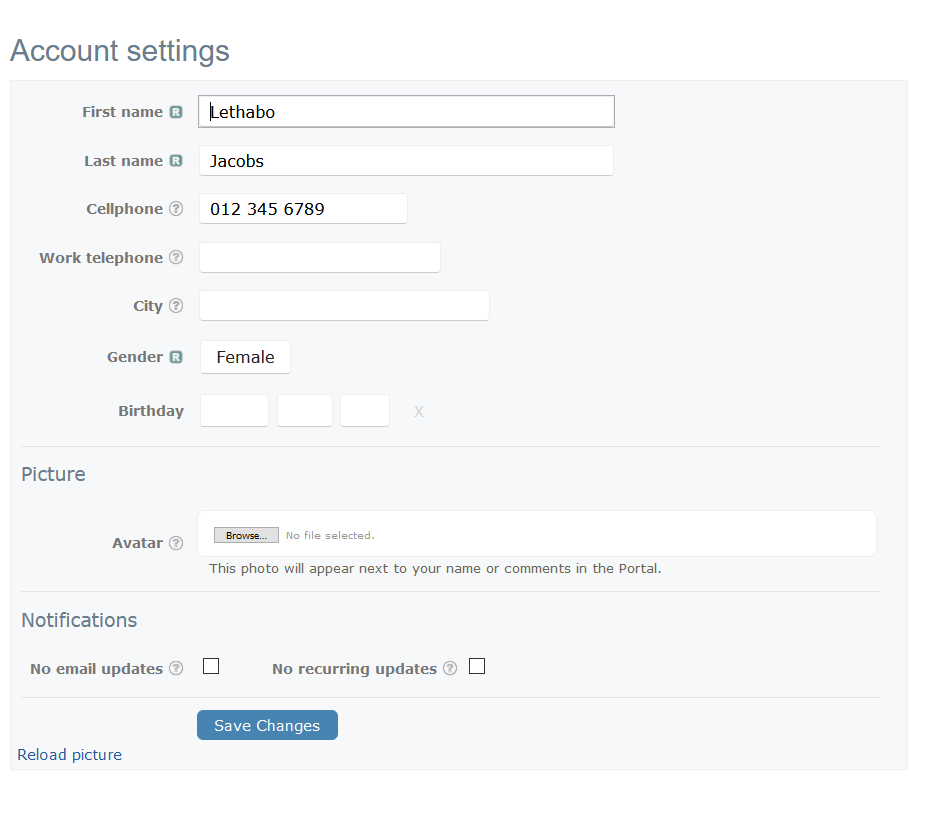
Your personal information is located in the column on the left and it is here where you can edit, add or remove information.
- Please take note that R’s in green boxes indicate a required field.

- More information about optional fields may be obtained by hovering your pointer over the relevant question mark.

You can also update your Avatar (your profile picture) in this section and also manage the notifications you receive from emails and Recurring Tasks.
If you reload Avatar (picture) it will refresh your picture in the system.
NB. don’t forget to save your changes before you navigate away from this page!
Changing your Password
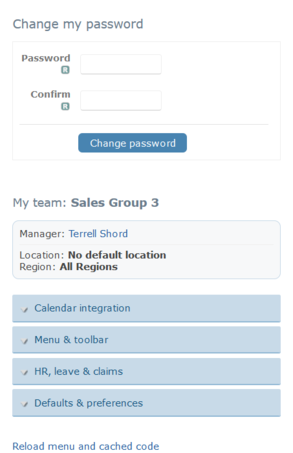
Password changes are made in this section of the system and we recommend that you do so as soon as possible after your first time login. Make sure to change it to a strong one that only you will remember.
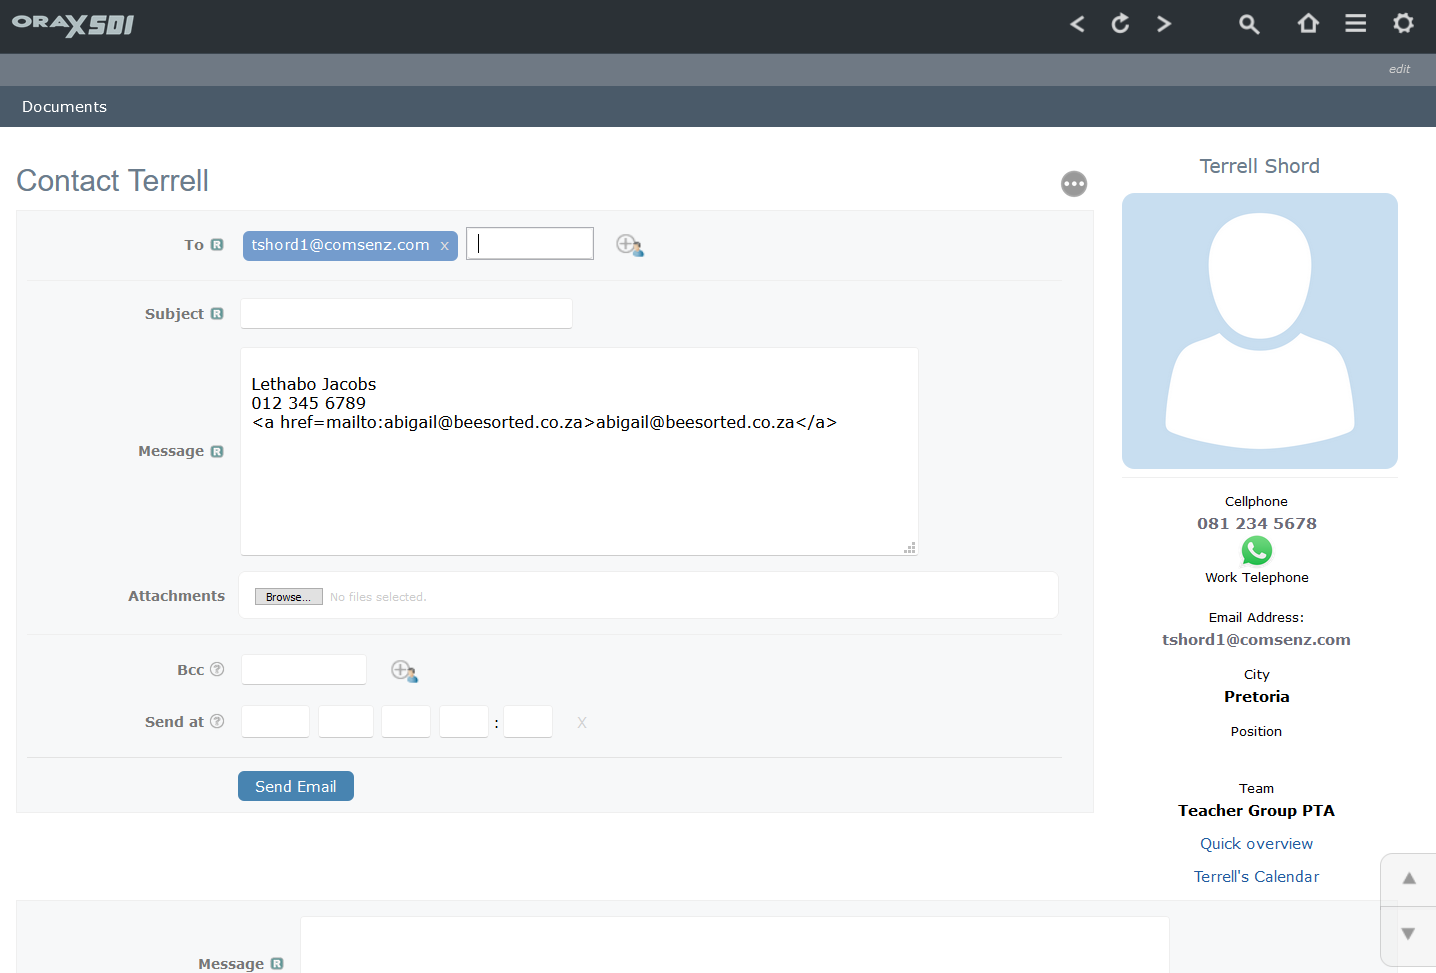
Contacting your Manager
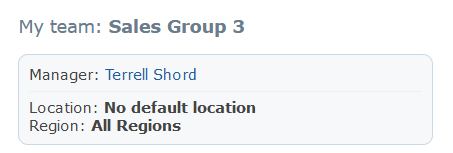
Below the password section, you are able to see the team you belong to (if applicable) and who your relevant manager is.
If you need to contact your manager click on their name and this will take you to their contact page, where you are able to send them an email or a personal message on Orax.
- If you want to go back to your Account Settings, click on the back button in your top Orax navigation bar.

Further Customization
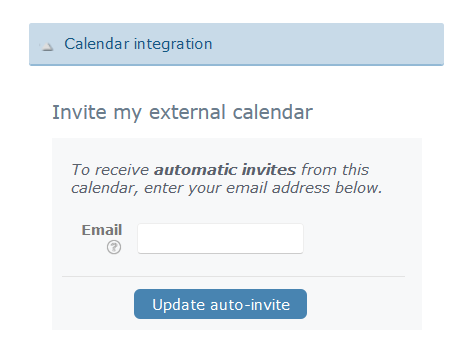
In the Calendar Integration section, you have the ability to configure a link between your external Calendar if you would like to forward meetings to a Calendar system you are already using outside of the Orax system.
This is done very easily by entering your personal email address, or the email address you associate with The Calendar you want to forward meetings to.
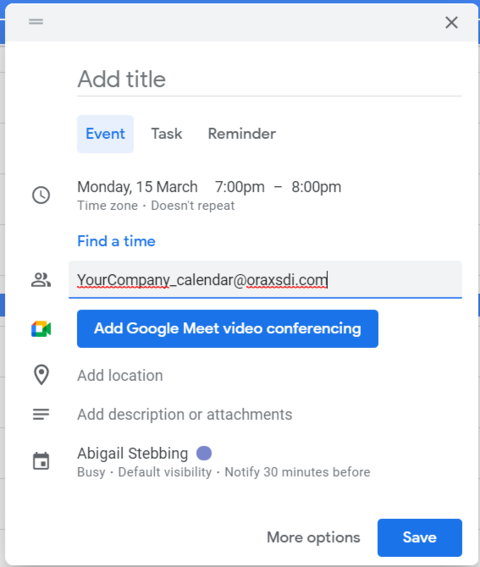
The same applies if you would like to forward meetings from your external Calendar to Orax, simply invite the Orax Calendar (YourCompany_calendar@oraxsdi.com) See the exact address at the bottom of your Month Calendar. Your SDI Calendar will be updated automatically.
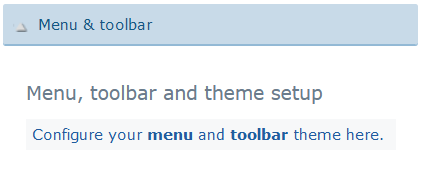
To customize your menu and toolbar, click on the “edit” button below the main menu selection in the navigation bar.

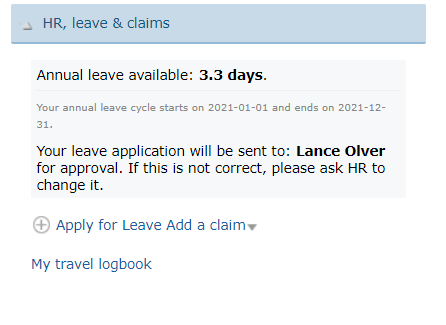
If you are eligible for leave or any Expense Claims, they will appear here under HR, leave & claims section. This information will only appear once your leave cycle and other relevant components have been set up in the HR module.
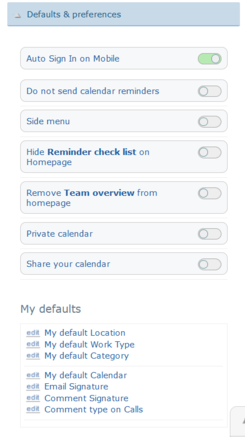
Under Defaults & Preferences, you can further customize Orax to suit your needs as well as set up your defaults and signatures. Do not be concerned if you don’t see some of the options, as these are related to various privileges that may or may not be assigned to you. For example, ’Remove Team overview from homepage’ would only appear if you have been assigned a managerial role.
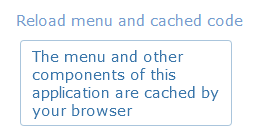
The “Reload menu and cached code” selection, which is found towards the bottom left corner of your screen, will refresh your menu and system cache so that any changes or updates made by yourself or your administrator, such as additional privileges etc. become visible in the menu.