Orax SDI Cloud Reference
- Introduction
- Self-Management tools
- Communication and Content management
- Sales and Customer Engagement
- Service Desk
- Project Management
- Automation & Wide-Area-Monitoring
- Job Cards
- Education & B-2-B online training
- Billing and customer statements
- Inventory & Asset management
- Production management
- Human Resources and Payroll
- Procurement and Supply chain
- Ledgers & Accounting
- Reporting and Analytics
- Administration & configuration
Sales Quotations
Sales Quotations turn into Sales Orders and then Invoices. To understand the sales fulfilment process, refer the below video.
Sales Fulfilment Process Overview
Duration: 01:53 minutes Streaming size: 3.8MB
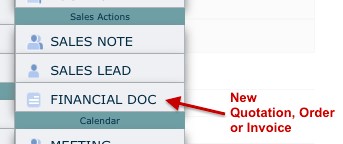 To create a quotation, use the "New" menu, and choose "Financial Doc". In order to create quotations, you'll need access to both Customer Accounts and Financial Documents. If you do not have these privileges, you will not see the applicable menu options. To address this, speak to your local administrator or manager.
 When creating Financial documents, you are presented with a form that allows the creation of several documents, eg. Sales Quotation, Sales Order, etc. Select "Sales Quotation" on the form. Now select a Customer account, enter a reference, then click Create to generate a Quotation with a unique number in the system. The "Reference" field is used as a descriptive title for your quotation (eg. "Consulting Services", or "Software implementation", or "PO#123", or "Project XX1").
On the new quotation, you may change the date and Reference (1). The customer (2), notes and attachments (3) and naturally add items (4) to sell.
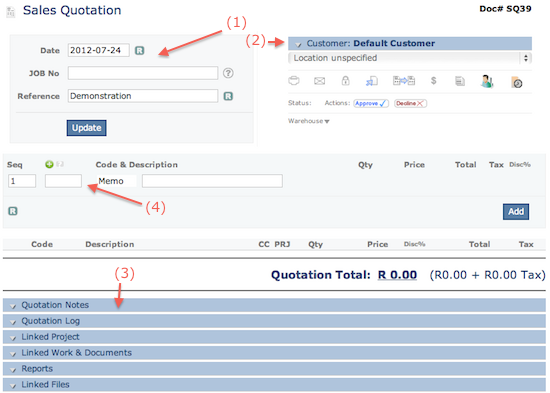
By default, you may add a Memo (text comment) to your quotation, but adding items, require that you "look them up" by typing a description, item code or barcode in the box on the left of "Memo". Typing something will display a list of matches. You may use the keyboard or mouse to select an item.
Once selected, the item will be loaded into the new item form with additional fields for Quantity, Price, etc.

Change the necessary detail like quantity, description, discount, etc and click Add or hit Enter on the keyboard. Your item is added to the Quotation and the total is updated. You may add more items or edit items by clicking on the Edit link.

The following are links to:
1. Print (view the printed format) the quotation.
2. Email or Fax the quotation.
3. Lock it to prevent further changes.
4. Import items from another Quotation/Order/Invoice.
5. Duplicate or process it.
6. Perform a Cash receipt.
7. Go back to Customer Accounts.
8. Go to this Customer account.
9. Create a follow-up reminder.
10. Approve, decline or cancel the quotation.

NOTE: Correctly approving, declining and cancelling your Sales Quotations are important because these statuses will affect your sales performance statistics and the sales leaderboard. A Cancelled Quotation is something that is not applicable or was incorrect. Quotations cannot be deleted, only cancelled. The difference between declined and approved quotations will present your Sales Conversion Rate.
If activated in your system, your may be required to request approval for all Sales Quotations (called Internal Approvals) or request approval for prices (called Minimum Price Approvals). This is configured in Financial Setup.